Making Of Byobu
We are happy to show you some photos of screen making. There are several process of handcraft work before it completes. We hope you learn how it is made, so that you can keep the art in proper conditions for a long time.
Step1.Byobu Panels
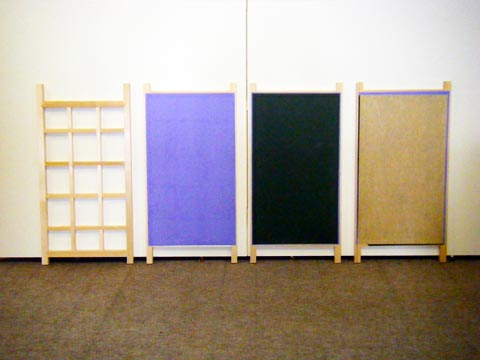
The lattice and stages of washi application.
The basic structure of a Japanese screen is formed by a wooden lattice frame made of bamboo, which provides a lightweight yet sturdy skeleton for each panel.
Step2.Applying Rice Glue
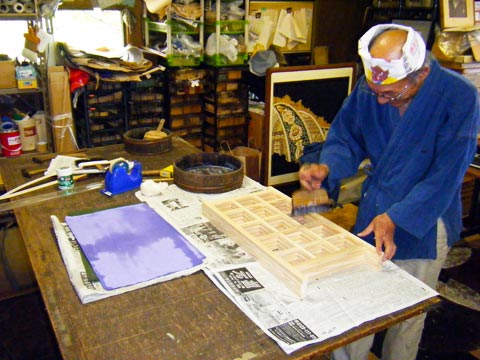
First, the lattice is covered with rice glue.
Each bamboo-lattice panel is spread with glue made from rice, and Japanese paper, washi, is laid taut over the frame. Four layers of washi are added to make a strong, firm base.
Step3.Adding the First Washi Layer
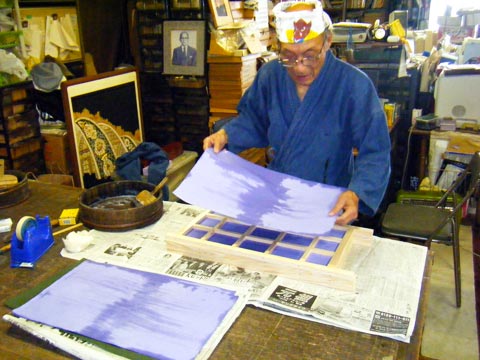
Next, the first layer of washi paper is stretched over the lattice.
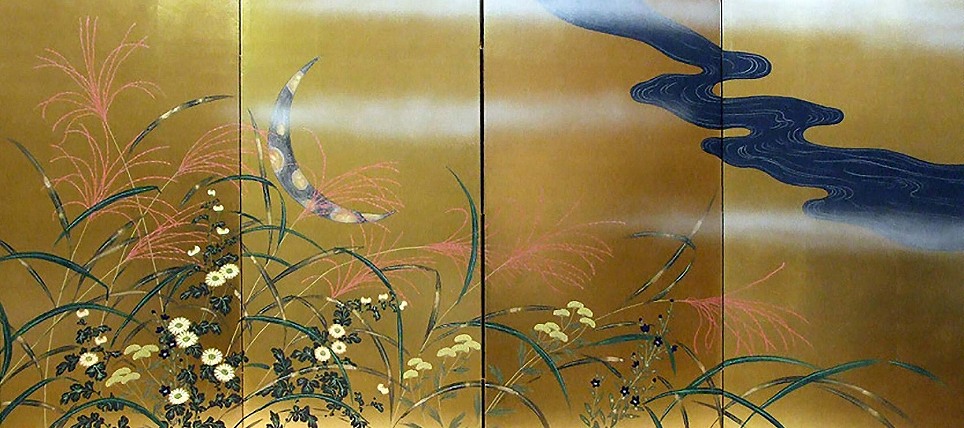
Next, the paper hinges are added. The hinges are designed to allow the panels fit flush, allowing the painting to flow smoothly from panel to panel and also to allow flexibility - a Japanese paper hinge can be rotated 360 degrees. Finally, a layer of gold leaf is applied over the washi, and the blank screen is sent to a studio to be hand painted.
Step4.Passing on the Technique
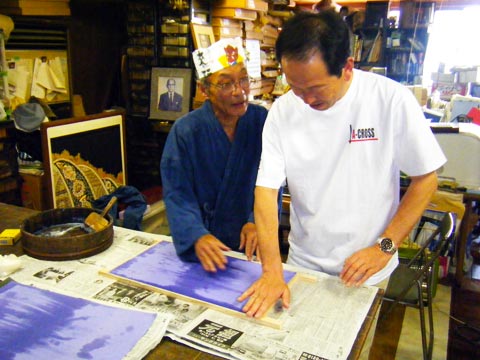
Saito of A-CROSS learns from Master Iohara.
After the screen has been painted, an embroidered brocade of silk is added. Usually this consists of one wide brocade and a very thin inner brocade of a contrasting color. As applying glue to the thin brocade can be a very tricky process, a wooden pin is glued, and the brocade wrapped around the pin.
Step5.Smoothing the Paper
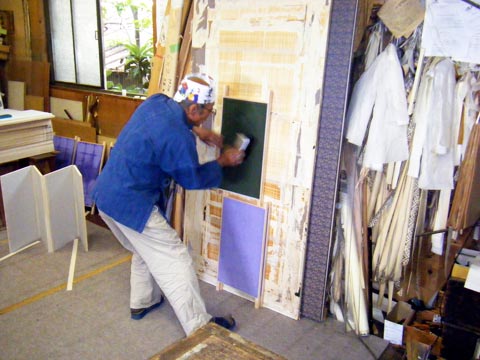
Further layers of washi paper are applied and smoothed out with a brush.
Once the brocade has been added, a lacquered frame encloses the screen, and the screen is ready to display. We also sell a variety of hangers to display your screen. View our hanger gallery here.